Spaces example
SAP Employee to Workday New Hire
In this example, we'll create a solution in Space that allows users to add a new employee in Workday based on SAP data. This process will use the SAP Employee to Workday New Hire Integration solution to transfer incoming employee data from SAP.
Space Administration
Step 1: Creating your integration

- Log in to the Boomi Enterprise Platform and click Integration from the welcome page.
- Click Create a New Process. The Build canvas opens with a Start step already placed. The configuration panel opens.
- Configure the Start step.
- Configure the Boomi for SAP Connector.
- Add SAP Profile with Field Description map.
- Add a Combine Data Process step.
- Configure the SAP Profile Header Detail Relationship map.
- Configure the Submit Accounting Journal map.
- Configure Boomi Workday instance.
- Add Stop Step.
For more detailed steps on creating an Integration, refer to Building a Boomi Integration.
Step 2: Creating a Packaged Component
- In the Project Canvas, click Create Packaged Component.
- Select the Process created in the previous section and click Next.
- Specify any required details, allow sharing, and click Create Packaged Component.
- Deploy the Packaged Component.
Step 3: Creating the Integration Pack
- Navigate to the Integration Packs page.
- Click Create Integration Pack.
- Specify the name SAP Employee to Workday New Hire, select Single Attachment for the Integration Pack type, and then click Create Integration Pack.
- Add the Packaged Component created in the previous section to this Integration Pack.
Step 4: Creating the Space
- Log in to the Boomi Enterprise Platform. Click the bento menu on the right and navigate to Labs > Spaces. On the Spaces page, click Create Space.
In the next step, you need to select an Account Group to associate with this Space. This will give all users in that group, access to the Space. If all current groups in the system are already assigned to a Space, you'll have to create a new group.
-
Select an existing Account Group, if available, or create a new one. For more information on creating a new Account Group, refer to Account Group Settings.
-
Click Create.
Step 5: Adding a site logo
- Go to the Space Information tab and upload your company’s space logo.
- Add alternative text for the site logo and click Save.
Step 6: Adding the Integration Pack
- Go to the Integration Packs tab and click Add integration Pack.
- Select the Integration Pack (created in Step 3: Creating the Integration Pack) from the drop-down list and click Continue.
- In the Tile Information page, upload a logo for your Integration Pack (Optional).
- You can also specify values for fields like Supported Applications, Demo Link, or your own custom fields to be displayed in the consumer view.
- Review how the space would look to the consumer, make any additional changes, and then click Add to Spaces.
- Similarly, you can add other Integration Packs that can be shared to this consumer Space.
You can configure access to Spaces either using the Boomi EmbedKit or the standalone embedded Marketplace. Boomi EmbedKit allows seamless integration of the Spaces solution with your application.
Space consumer view
The following example illustrates the Spaces solution embedded within the UI of the Workday application. A similar workflow is applicable for the standalone Spaces Marketplace.
Prerequisite
You are able to view the SAP Employee to Workday New Hire Integration in your Space.
Installing the Integration
To install and use the Integration solution from Spaces:
-
Log in to the Space your administrator has given access to. You will be able to view your Space.
-
Install the SAP Employee to Workday New Hire Integration.
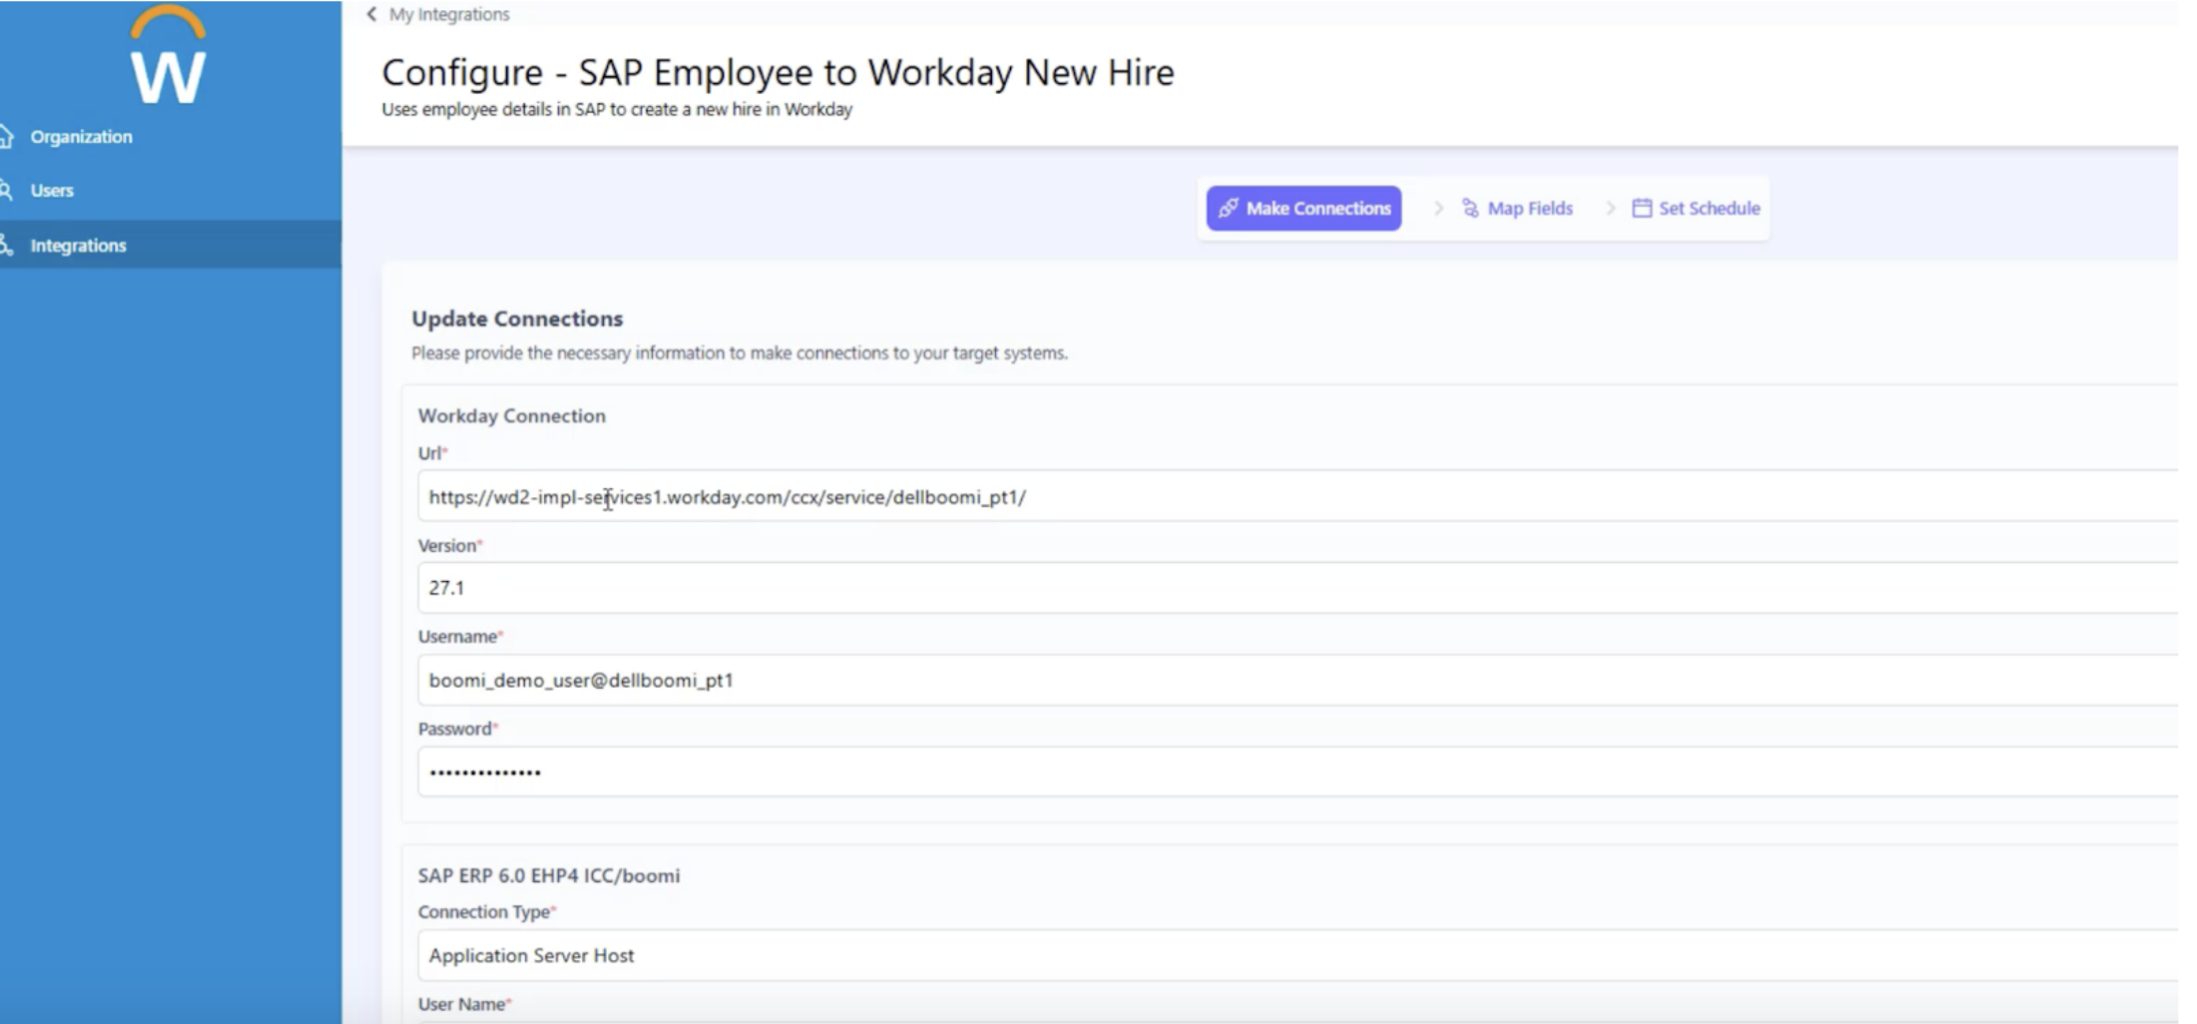
-
In the configuration step, provide the connection information, such as the connection URL, version, and login credentials for Workday and SAP ERP.
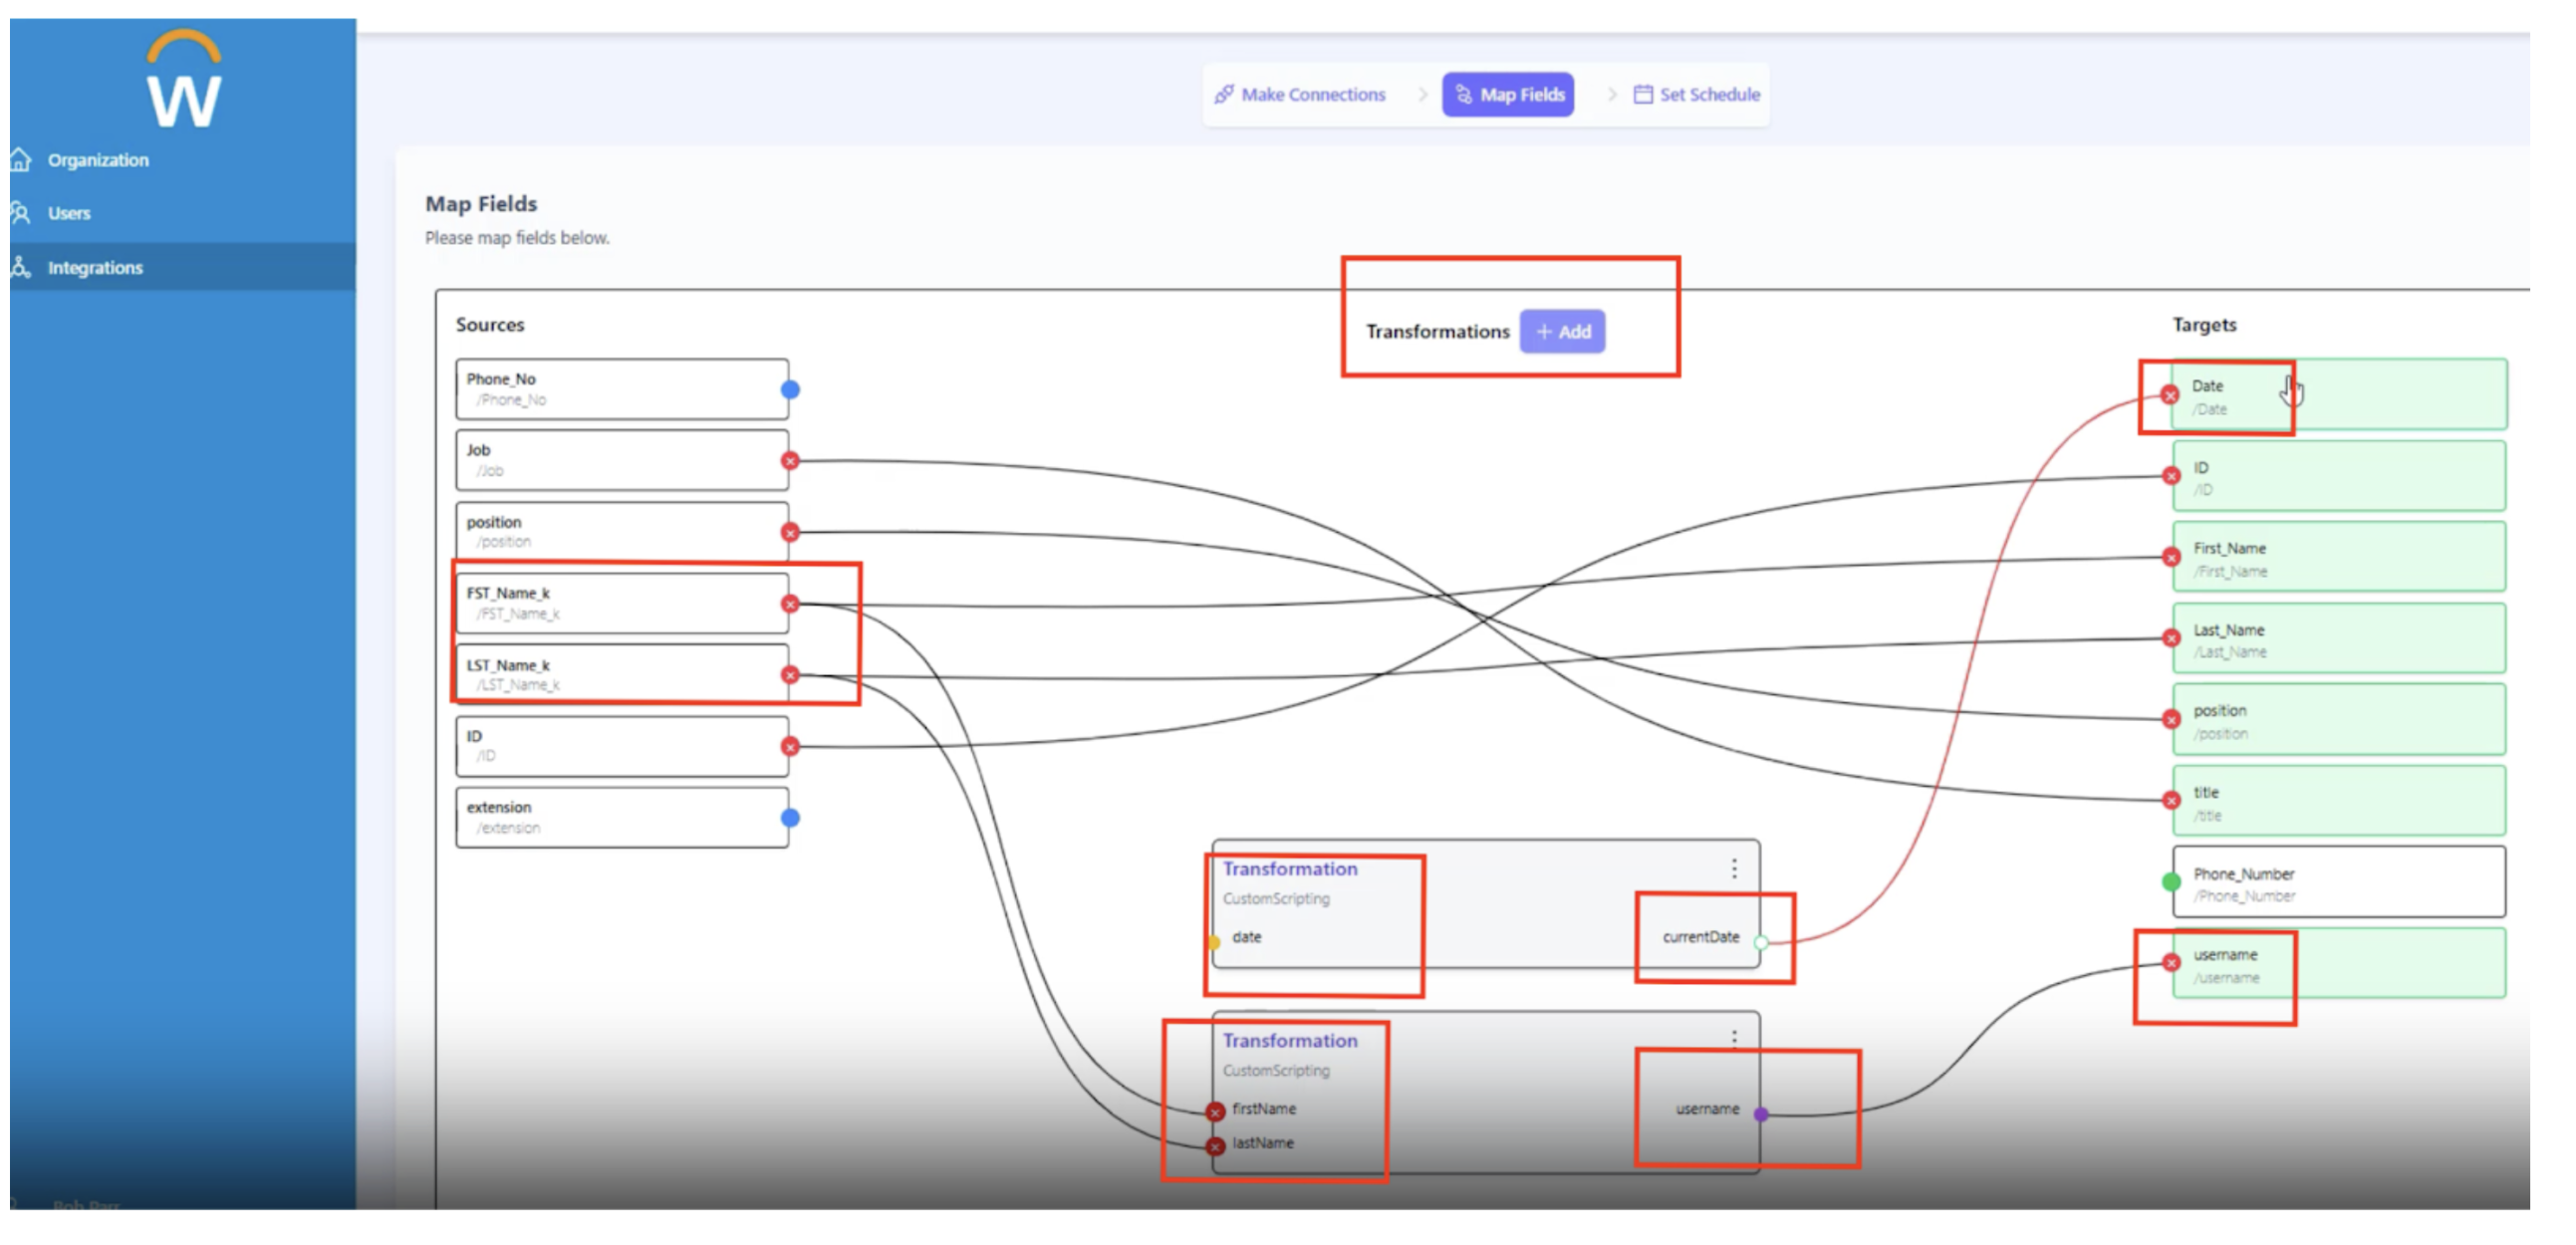
-
Map Fields: In the Map Fields page, you can map the source fields in SAP ERP to the targets in Workday.
-
Click Add to open the Transformation Editor for source fields that need to be transformed before they can be mapped to targets. The editor lets you input your transformation requirements in natural language. For example,
Create a username that equals the first letter of the first name’ + the entire last name + a random digit from 1 to 1000.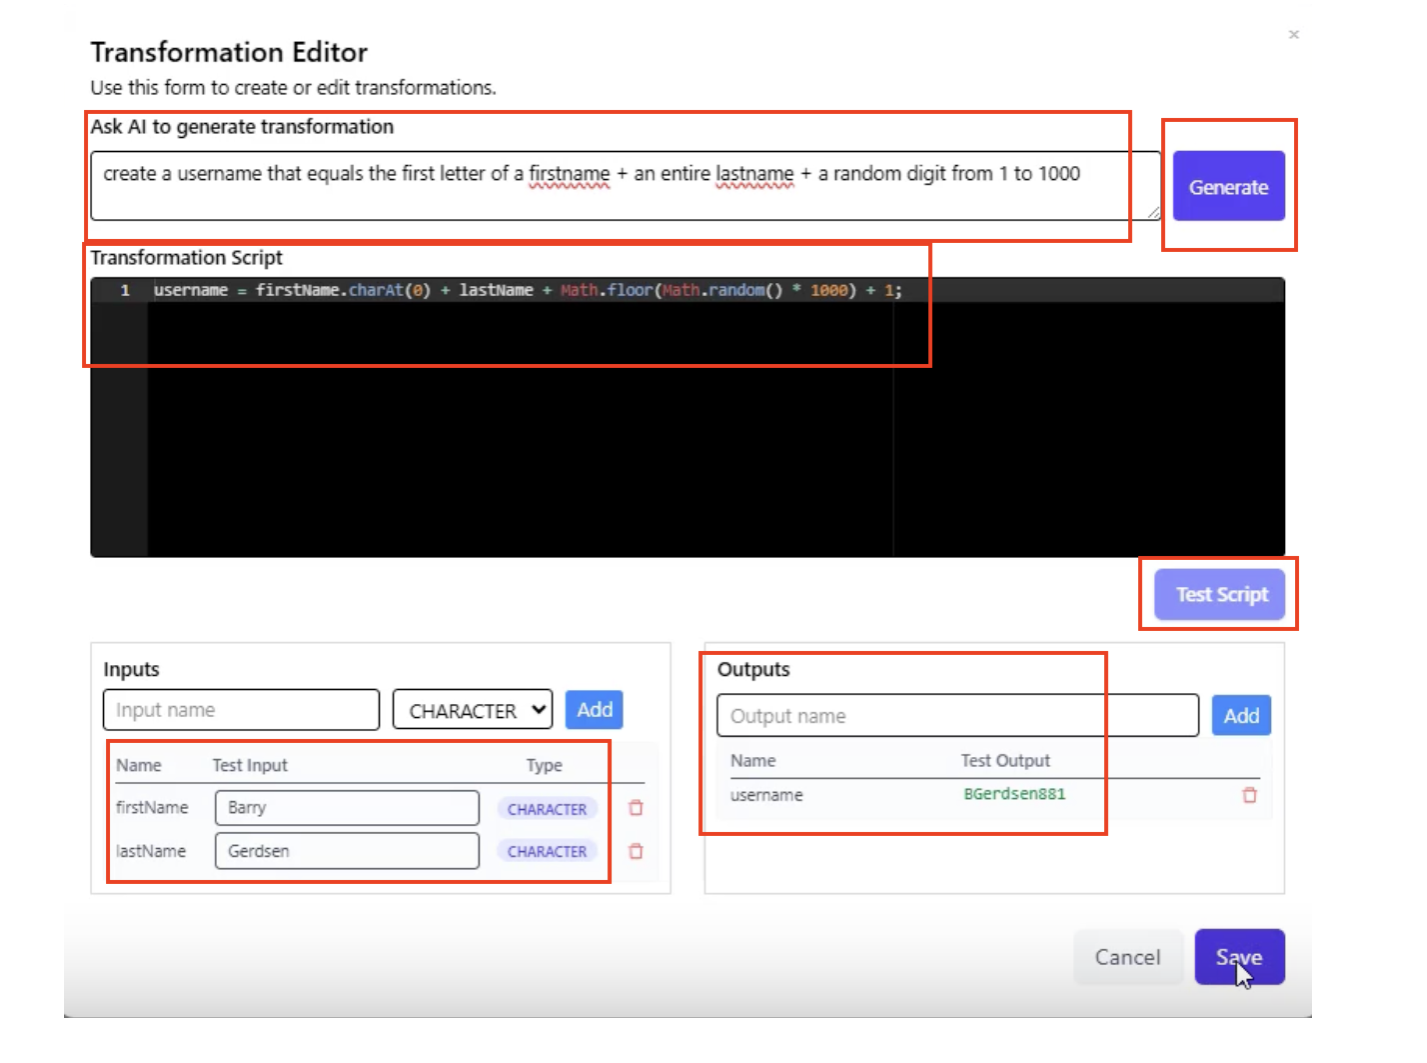
-
Click Generate. The transformation script is generated.
-
Provide your input fields and click Test Script.
-
Verify the generated output and click Save.
-
Map the inputs from the Source to the inputs of the Transformation and the output to a field in the Target.
-
Similarly, create a Transformation to generate today’s date in ‘mm/dd/yyyy’ format and link it to the target Date field. Your mapping canvas will look like this:
-
-
Set Schedule: Specify preferences to schedule running the Integration by the hour, day, or minute, and click Save and Close. Alternatively, you can also run the Integration instantly.
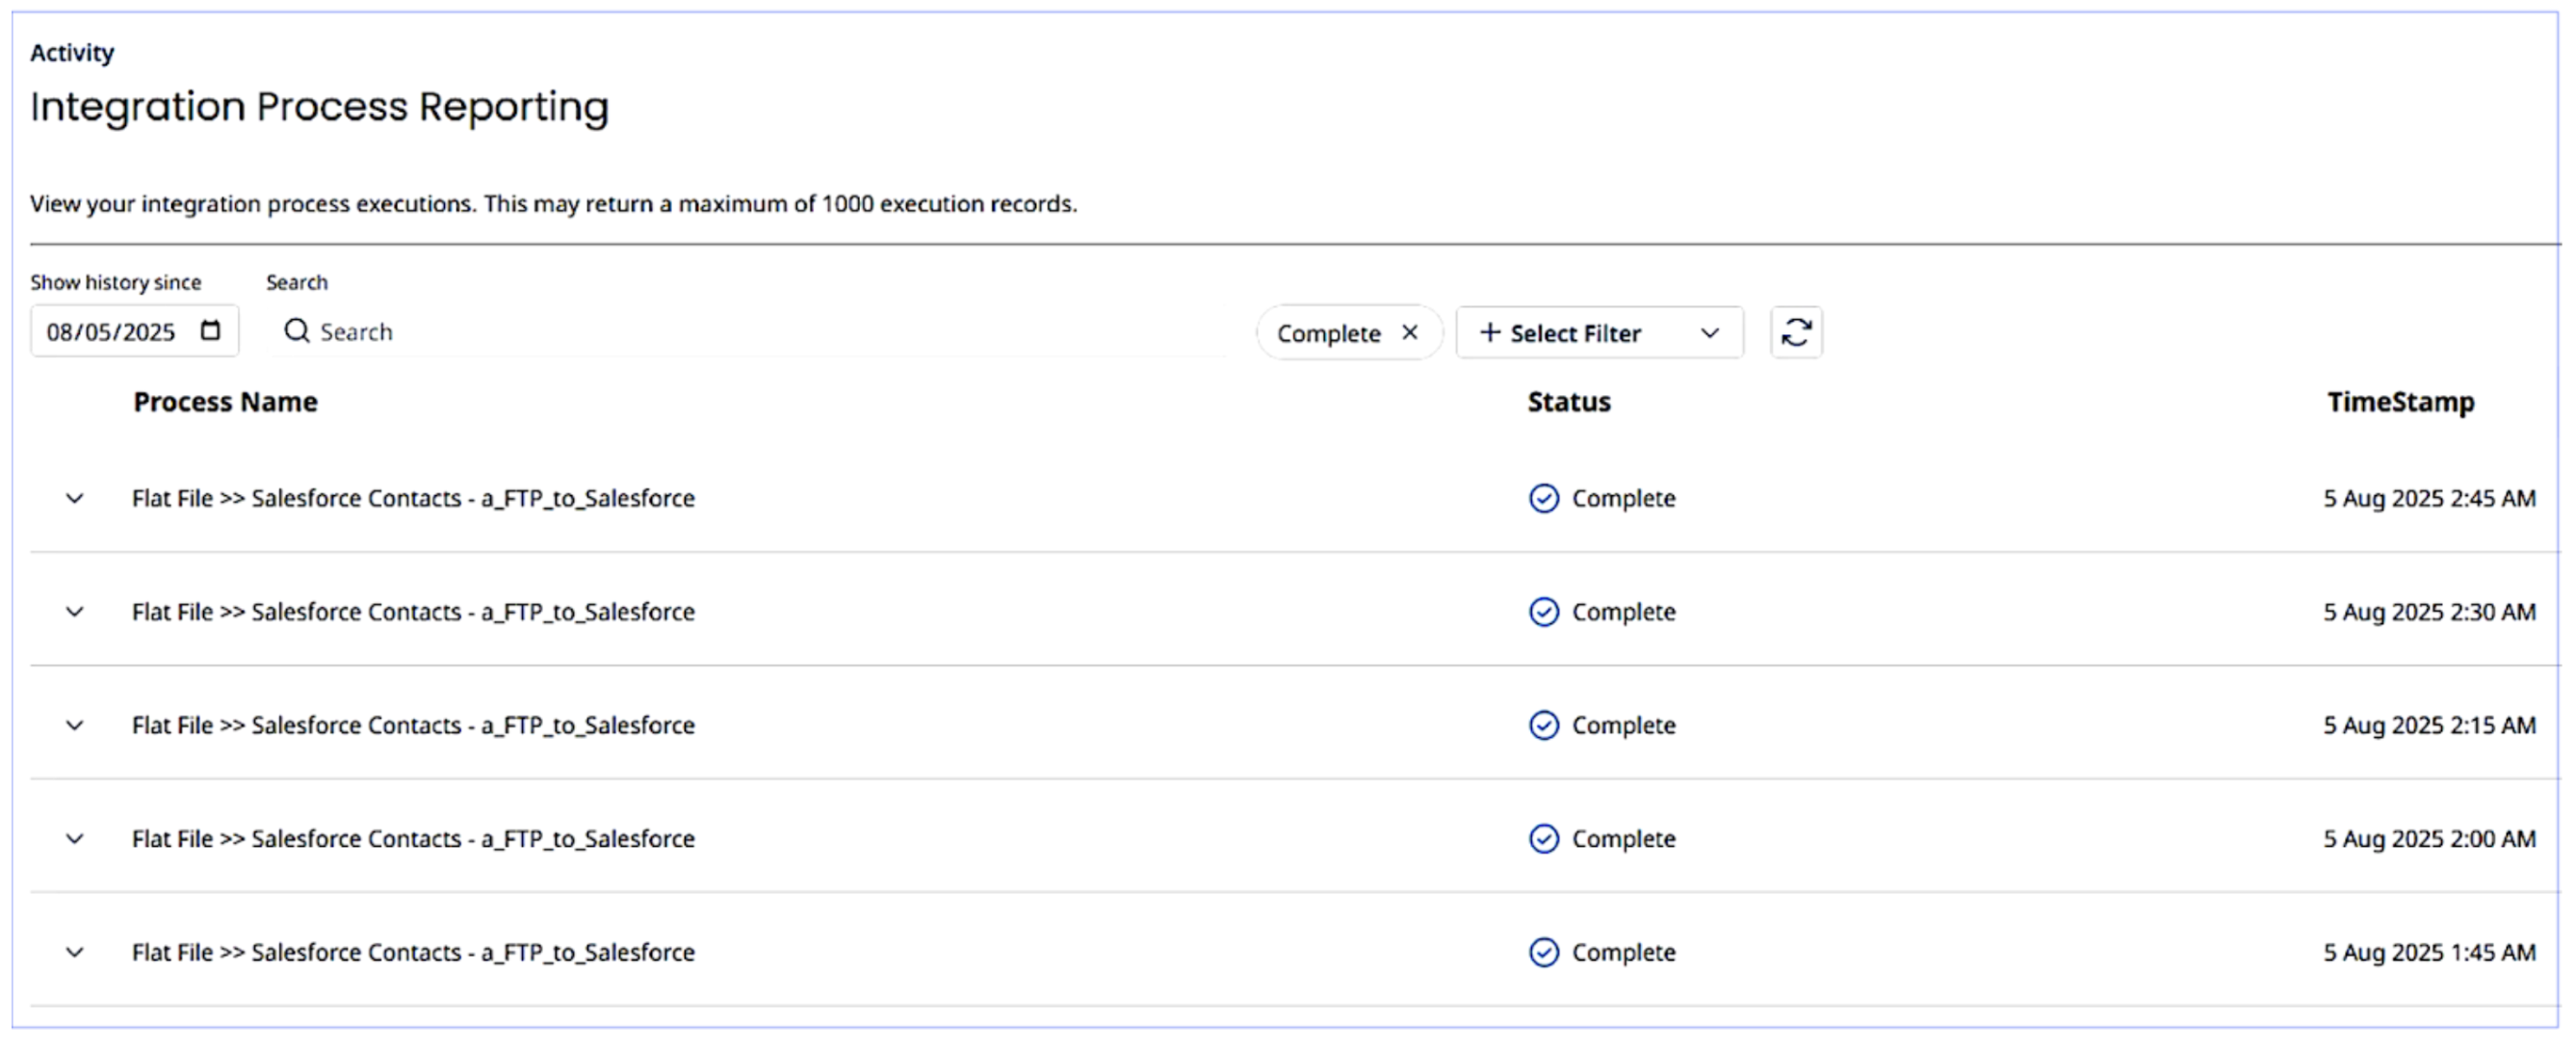
-
Check out the Integration Process Reporting dashboard to track the execution history of your Integration processes.